If you’re reading this, then you probably already know all about our Straw Hat Wonder. Monkey D. Luffy, aka Luffy; is the beloved main character of the world-famous anime called: One Piece. He has an iconic look that is made famous by his straw hat, lanky body, and big smile. While there are many forms that Luffy takes throughout his adventures, we will be focusing on his base form.
According to various websites such as Fandom, Luffy stands at 5ft 7 inches while at the age of 17. He traditionally is seen wearing blue pants, a red shirt, and a straw hat. His outfits change throughout his adventures, but he always keeps his signature hat. Our step by step guide on creating Luffy was made by our friend Jess. Detailed below is a numbered guide sharing how she draws Luffy. Jess a very talented graphic designer who enjoys anime as much as we do. Now that you’re warmed up, let’s get started!
Creating The Gesture
1.) Start with a circle and block out the shape of the face. The vertical line represents the center of the face and the direction we want our character to be looking. The horizontal line also represents the center of the face and where the bottom of the eyes will sit.

2.) To start, I drew one line going down. This line doesn’t need to be perfectly straight and will help create the shape of the body by acting as the spine. Draw two circles, roughly two and a half heads in length from the top of the first circle to the bottom of the second circle. The first circle is the chest, you can also a “w” shape similar to what I did to help create the rib cage. The second circle will help shape the hips and crotch of our character.

3.) Luffy’s arms are thin. Our simple ovals will help with the sizing and placement of the arms and hands. Note that the elbows reach slightly above the head.

4.) Moving on to a more dynamic pose for our legs. The best tip is to start simple. I like to add circles for where the knees will be and build off of that once I am comfortable with my proportions. Keep in mind when things are closer to you, they appear bigger, and the further away they seem smaller. In different art styles we have the ability to exaggerate this, so don’t get too caught up in this step if you think you are having trouble.

Congrats, you completed the gesture section. Your Luffy drawing should be coming along pretty well and might look something like this. In the next section, we are going to be adding line art and start bringing this body to life!

Adding Line Art
5.) Have fun with this step! The face is always a big focal point and the expression can change the whole mood of a pose. I went with a typical Luffy expression. The guidelines we made in the first step will help with the placement of our face. Eyes will sit on the top of the horizontal line and ears will sit below.

6.) Go ahead and add some hair. We see that the top of the head was made in our gesture drawing. Knowing this we can draw Luffy’s hair below this on the hat sitting on top.

7.) Keep the jacket flowy with organic lines. This is also where our gesture helps us guide where to place our sleeves and the length.

8.) At Luffy’s waist, we have his sash. This doesn’t need to be exact to mine. This is an opportunity to add movement/action to the pose.

9.) Following our gesture, we can now block out the chest. You can get more detailed with the muscles, however, I went more simplistic. Remember to draw in his scar and follow our “spine” we made earlier to capture the movement of the pose.

10.) For his pants, my biggest tip is to add wrinkles and creases to help portray his action pose.

11.) Feet are one of the more difficult things to draw. I like to start with an “8” to map out where the toes and balls of the feet will be.

12.) Next are the arms and hands. Similar concept to the feet, objects that are closer to you are bigger and further away draw smaller.

13.) Remove or erase the gesture drawing.

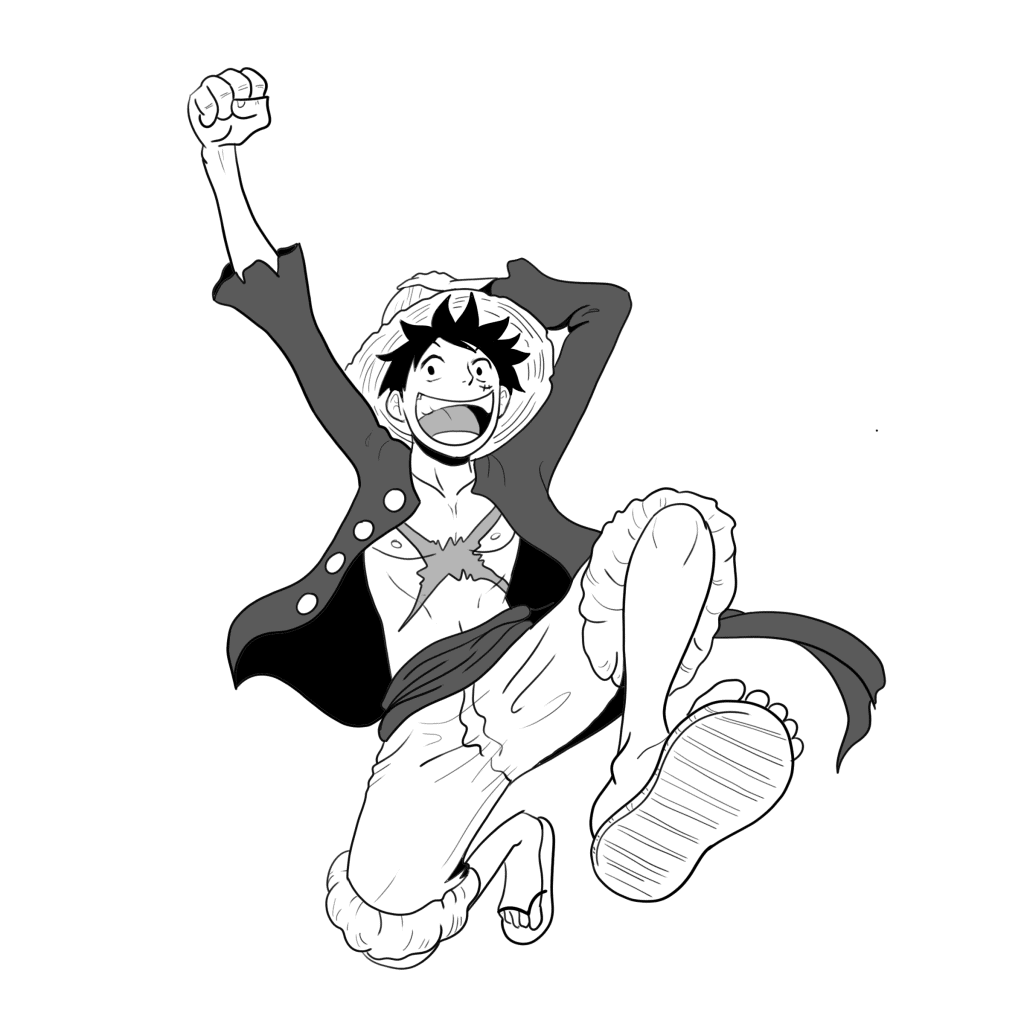
14.) Add in any shading and fine details.

Congrats, you did it. You made your very own Luffy! Now that your finished, feel free to type what you thought about our guide in the comments below. Perhaps share a link to your very own Luffy drawing. Or you can click on Art and Design from our menu and find more How-To-Draw articles to try for yourself.